Introduction to the Command Line
Adapted from Introduction to the Command Line by Kelsey Chatlosh, Patrick Smyth, Mary Catherine Kinniburgh, and Jojo Karlin for Graduate Center Digital Research Institute January 2020 Curricula. Copyright (c) 2020-present Sabina Pringle with a Creative Commons Attribution-ShareAlike 4.0 International license.
Overview and learning goals
Many of us have had some interaction with computers, and can explain what a screen and a cursor are, and how to point and click on icons. When we do this, we are relying on a graphical user interface, or GUI (pronounced “gooey!”).
In this session we are going to explore another way to make a computer do things: through the command line. Instead of pointing and clicking, we will be typing in the laptop’s terminal to tell the computer directly what task to perform.
While this new technique can seem intimidating if you have not used text-based interfaces before, luckily, you can use 90% of the functionality of the command line by becoming comfortable with a very small set of the most common commands.
In this session, we will:
- learn common commands to create files (touch and echo)
- learn commands to create directories (mkdir)
- navigate our file structure using change directory (cd), print working directory (pwd), -and list (ls)
- move content from one place to another using redirects (>) and pipes
- explore a comma separated values (.csv) dataset using word and line counts, head and tail, and the concatenate command cat
- search text files using the grep command
- create and sort cheat sheets for the commands we learn
What is the command line?
The command line is a text-based way of interacting with your computer. You may hear it called different names, such as the terminal, the shell, or bash. In practice, you can use these terms interchangeably. (If you’re curious, though, you can read more about them in the glossary. The shell we use (whether terminal, shell, or bash) is a program that accepts commands as text input and converts commands into appropriate operating system functions.
What does “text-based” mean?
For those of us comfortable reading and writing, the idea of “text-based” in the context of computers can seem a bit strange. As we start to get comfortable typing commands to the computer, it’s important to distinguish “text” from word processed, desktop publishing (think Microsoft Word or Google Docs) in which we use software that displays what we want to produce without showing us the code the computer is reading to render the formatting. Plain text has the advantage of being manipulable in different contexts.
Let’s take a quick moment to discuss text and text editors.
Text editors
What is text?
Before we explain which program we will use for editing text, we want to give a general sense of this “text” we keep mentioning. For those of us in the humanities, the word “text” has different and specific meanings in different fields and subfields. As scholars working with computers, we need to be aware of the ways plain text and formatted text differ. Words on a screen may have hidden formatting. If you are familiar with HTML and making websites, you might know that in order to display even the simplest text on your website, you need specific codes. When we look at a Microsoft Word or other word processing software document, many of us don’t realize how much is going on behind the words shown on the screen. For the purposes of communicating with the computer and for easier movement between different programs, we need to use text without hidden formatting.
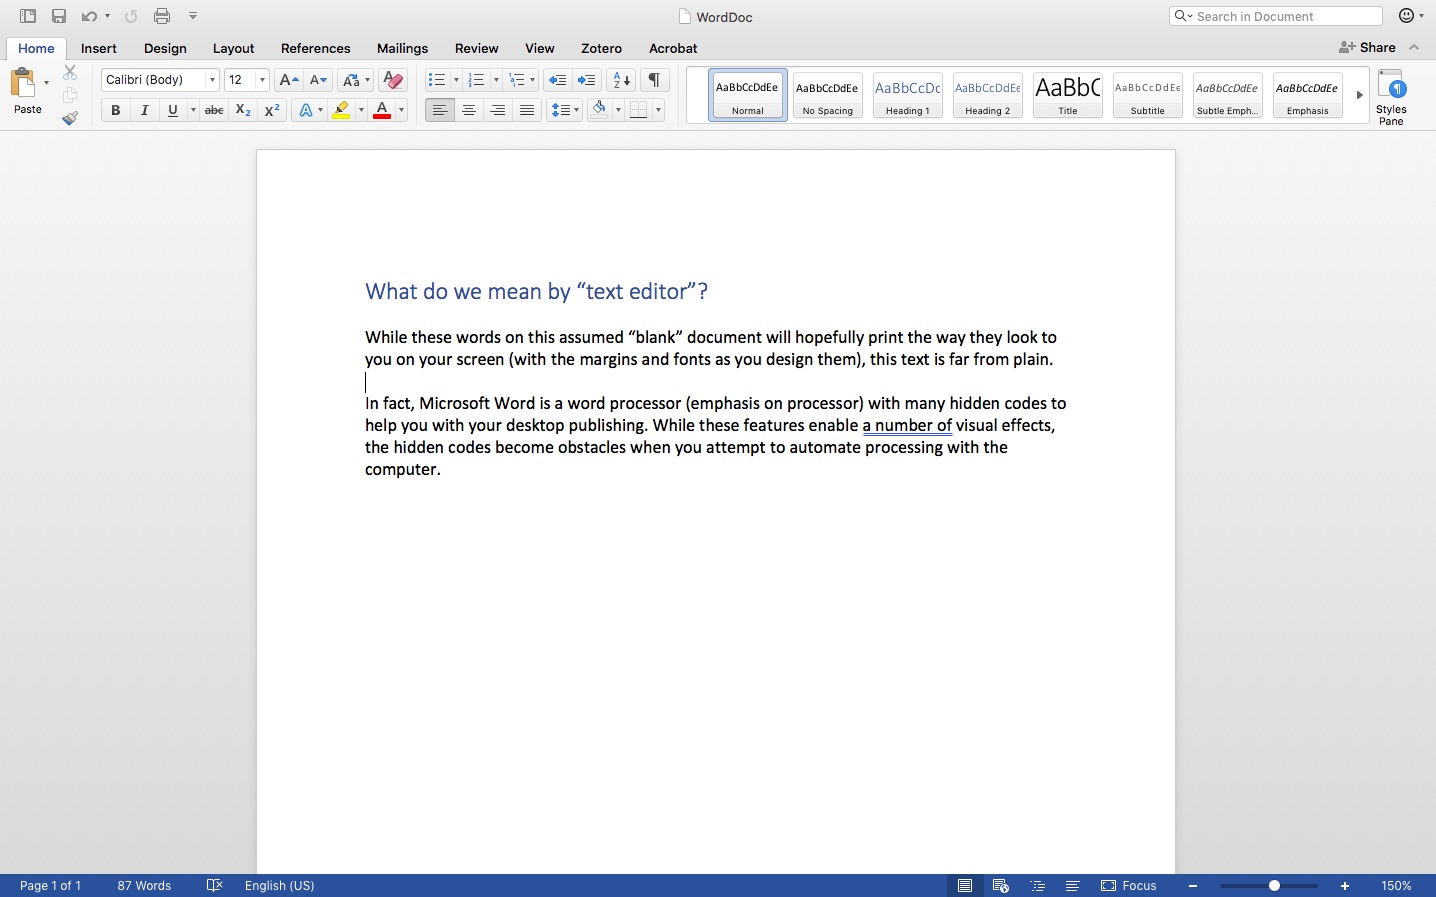
If you ask the command line to read that file, this Word .docx file will look something like this
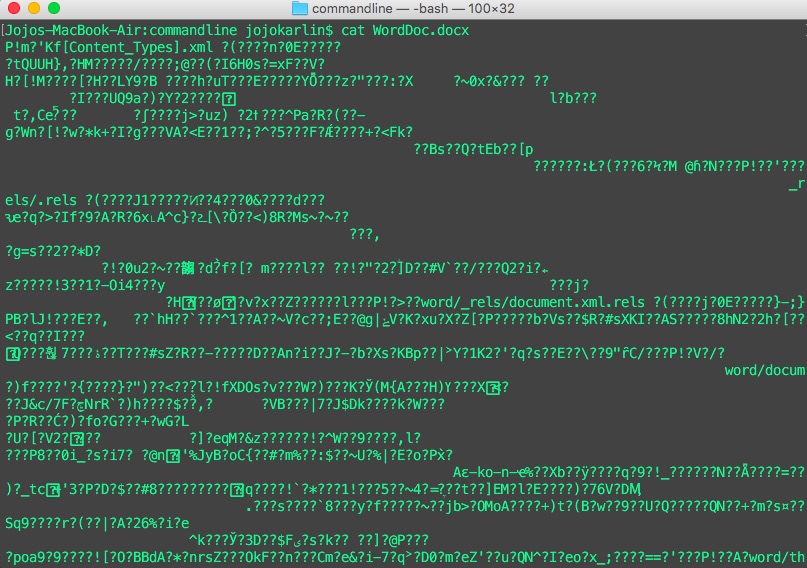
Word documents which look like “just words!” are actually comprised of an archive of extensible markup language (XML) instructions that only Microsoft Word can read. Plain text files can be opened in a number of different editors and can be read within the command line.
Plain Text
For the purposes of communicating with machines and between machines, we need characters to be as flexible as possible. Plain text includes characters of readable material but not graphical representation.
According to the Unicode Standard,1.
Plain text is a pure sequence of character codes; plain Unicode-encoded text is therefore a sequence of Unicode character codes.
Plain text has two main properties with regard to rich text:
Plain text is the underlying content stream to which formatting can be applied. Plain text is public, standardized, and universally readable.
Plain text can be moved between programs fluidly and can respond to programmatic manipulations. Because it is not tied to a particular font or color or placement, plain text can be styled externally.
A counterpoint to plain text is rich text (sometimes denoted by the Microsoft rich text format “.rtf” file extension) or “enriched text” (sometimes seen as an option in email programs). In rich text files, plain text is elaborated with formatting specific to the program in which they are made.
Text editors
An important tool for programming and working in the command line is a text editor. A text editor is a program that allows you to edit plain text files, such as .txt, .csv, or .md. Text editors are not used to edit rich text documents, such as .docx or .rtf, and rich text editors should not be used to edit plain text files. This is because rich text editors will add many invisible special characters that will prevent programs from running and configuration files from being read correctly.
While it doesn’t really matter which text editor you choose, you should try to become comfortable with at least one text editor.
Default text editor for this course
Choosing a text editor has as much to do with personality as it does with functionality. Graphical user interfaces (GUIs), user options, and “hackability” vary from program to program. For our workshops, we will be using Visual Studio Code (VS Code). Not only is VS Code free and open source, but it is also consistent across OSX, Windows, and Linux systems.
Visual Studio Code has been preinstalled on your laptop. We won’t be using the editor a lot in this tutorial, so don’t worry about getting to know the editor now. In later workshops we will discuss syntax highlighting and version control, which VS Code supports. For now we will get back to working in the command line itself.
Why is the command line useful?
Initially, for some of us, the command line can feel a bit unfamiliar. Why step away from a point-and-click workflow? By using the command line, we move into an environment where we have more minute control over each task we’d like the computer to perform. Instead of getting your food made by someone else, you’re cooking. It’s more work, but there are also more possibilities.
The command line allows you to…
- Easily automate tasks such as creating, copying, and converting files.
- Set up your programming environment.
- Run programs you create.
- Access the (many) programs and utilities that do not have graphical equivalents.
- Control other computers remotely.
In addition to being a useful tool in itself, the command line gives you access to a second set of programs and utilities and is a complement to learning programming.
What if all these cool possibilities seem a bit abstract to you right now? That’s all right! On a very basic level, most uses of the command line are about showing information that the computer has, or modifying or making things (files, programs, etc.) on the computer.
In the next section, we’ll make this a little more clear by getting started with the command line.
Getting to the command line
Ubuntu
The operating system you are using is Ubuntu2.There are two ways to get to the command line in Ubuntu.
First way:
Double-click on the terminal icon on the left hand side of your screen. The terminal icon looks a bit like this: >_
Second way:
- Double-click on the word “Activities” in the top left corner of your screen.
- Type “terminal” into the bar that appears.
- Select the first item that appears in the list.
The terminal will look like this:
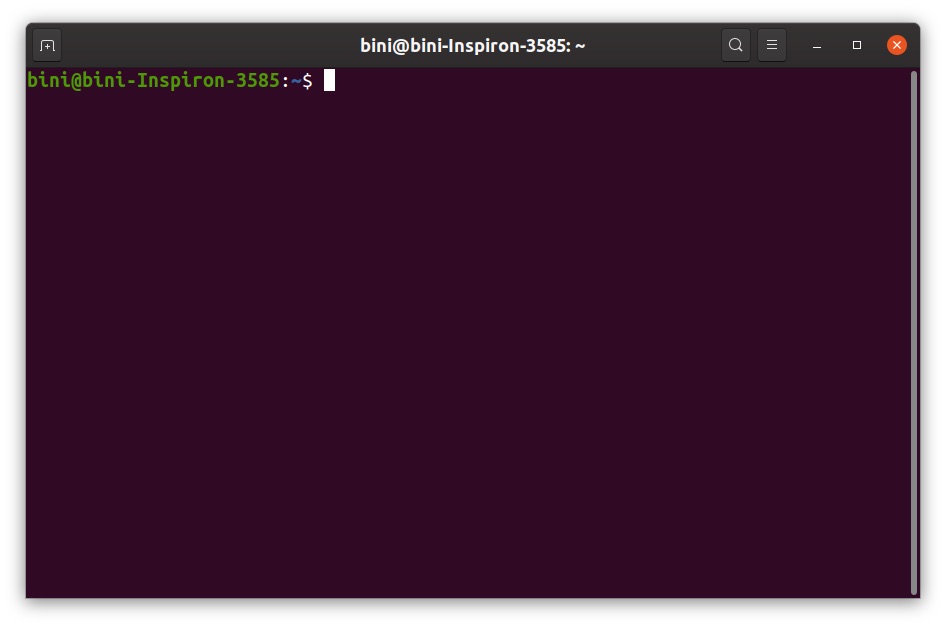
When you see the $, you’re in the right place. We call the $ the command prompt; the $ lets us know the computer is ready to receive a command. The command prompt is the place you type commands you wish the computer to execute. We will now learn some of the most common commands.
In the next section, we’ll learn how to navigate the filesystem in the command line.
Navigation
Prefatory pro tips
Go slow at first and check your spelling!
One of the biggest things you can do to make sure your code runs correctly and you can use the command line successfully is to make sure you check your spelling! Keep this in mind today, this week, and your whole life. If at first something doesn’t work, check your spelling! Unlike in human reading, where letters can simultaneously have different uses and meanings, in coding, each character has a discrete function including (especially!) spaces.
Keep in mind that the command line and file systems are usually pre-configured as cAsE-pReSeRvInG – so capitalizations also matter when typing commands and file and folder names.
Also, while copying and pasting from this handy tutorial may be tempting to avoid spelling errors and other things, we encourage you not to! Typing out each command will help you remember them and how they work.
Getting started: know thyself
You may also see your username to the left of the command prompt $. Let’s try our first command. Type the following and press the enter key:
$ whoami
The whoami command should print out your username. Congrats, you’ve executed your first command! This is a basic pattern of use in the command line: type a command, press enter on your keyboard, and receive output.
Orienting yourself in the command line: folders
OK, we’re going to try another command. But first, let’s make sure we understand some things about how your computer’s filesystem works.
Your computer’s files are organized in what’s known as a hierarchical filesystem. That means there’s a top level or “root” folder on your system. That folder has other folders in it, and those folders have folders in them, and so on. You can draw these relationships in a tree:
Users
|
-- bini
  |
  -- Applications
  -- Desktop
  -- Documents
The root or highest-level folder on Linux is just called /. We won’t need to go in there, though, since it mostly just contains files for the operating system.
Note that we are using the word “directory” interchangeably with “folder”–they both refer to the same thing.
OK, let’s try a command that tells us where we are in the filesystem:
$ pwd
You should get output like bini. That means you’re in the bini directory in the Users folder inside the / or root directory. The folder you’re in is called the working directory, and pwd stands for “print working directory.”
The command pwd won’t actually print anything except on your screen. This command is easier to grasp when we interpret “print” as “display.”
OK, we know where we are. But what if we want to know what files and folders are in the bini directory, a.k.a. the working directory?
Try entering:
$ ls
You should see a number of folders, probably including Documents, Desktop, and so on. You may also see some files. These are the contents of the current working directory. ls will “list” the contents of the directory you are in.
Wonder what’s in the Desktop folder? Let’s try navigating to it with the following command:
$ cd Desktop
The cd command lets us “change directory.” (Make sure the “D” in “Desktop” is capitalized.) If the command was successful, you won’t see any output. This is normal —- often, the command line will succeed silently.
So how do we know it worked? That’s right, let’s use our pwd command again. We should get:
$ pwd
/Users/bini/Desktop
Now try ls again to see what’s on your desktop. These three commands — pwd, ls, and cd — are the most commonly used in the terminal. Between them, you can orient yourself and move around.
Before we move on, let’s take a minute to navigate through our computer’s file system using the command line.
Challenge
Use the three commands you’ve just learned — pwd, ls and cd — eight (8) times each. Go poking around your Pictures folder, or see what’s so special about that root / directory. When you’re done, come back to the home folder with
$ cd ~
(That’s a tilde, on the top left of your keyboard.) One more command you might find useful is
$ cd ..
which will move you one directory up in the filesystem. That’s a cd with two periods after it.
Compare with the GUI
It’s important to note that this is the same old information you can get by pointing and clicking displayed to you in a different way.
Go ahead and use pointing and clicking to navigate to your working directory–you can get there a few ways, but try starting from “Files” and clicking down from there. You’ll notice that the folder names should match the ones that the command line spits out for you, since it’s the same information! We’re just using a different mode of navigation around your computer to see it.
Creating files and folders
Creating a file
So far, we’ve only performed commands that give us information. Let’s use a command that creates something on the computer.
First, make sure you’re in the home directory:
$ pwd
/Users/bini
Let’s move to the Desktop folder, or “change directory” with cd:
$ cd Desktop
Once you’ve made sure you’re in the Desktop folder with pwd, let’s try a new command:
$ touch foo.txt
If the command succeeds, you won’t see any output. Now move the terminal window and look at your “real” desktop, the graphical one. See any differences? If the command was successful and you were in the right place, you should see an empty text file called “foo.txt” on the desktop. Pretty cool, right?
Handy tip: up arrow
Let’s say you liked that “foo.txt” file so much you’d like another! In the terminal window, press the “up arrow” on your keyboard. You’ll notice this populates the line with the command that you just wrote. You can hit “Enter” to create another “foo.txt,” (note - touch command will not overwrite your document nor will it add another document to the same directory, but it will update info about that file.) or you could use your left/right arrows to change the file name to “foot.txt” to create something different.
As we start to write more complicated and longer commands in our terminal, the “up arrow” is a great shortcut so you don’t have to spend lots of time typing.
Creating folders
OK, so we’re going to be doing a lot of work during the Digital Research Institute. Let’s create a project folder in our Desktop so that we can keep all our work in one place.
First, let’s check to make sure we’re still in the Desktop folder with pwd:
$ pwd
/Users/bini/Desktop
Once you’ve double-checked you’re in Desktop, we’ll use the mkdir or “make directory” command to make a folder called “projects”:
$ mkdir projects
Now run ls to see if a projects folder has appeared. Once you confirm that the projects folder was created successfully, cd into it.
$ cd projects
$ pwd
/Users/bini/Desktop/projects
OK, now you’ve got a projects folder that you can use throughout the Institute. It should be visible on your graphical desktop, just like the foo.txt file we created earlier.
Creating a cheat sheet
In this section, we’ll create a text file that we can use as a cheat sheet. You can use it to keep track of all the awesome commands you’re learning.
Echo
Instead of creating an empty file like we did with touch, let’s try creating a file with some text in it. But first, let’s learn a new command: echo
$ echo "Hello from the command line"
Hello from the command line
Redirect (>)
By default, the echo command just prints out the text we give it. Let’s use it to create a file with some text in it:
$ echo "This is my cheat sheet" > cheat-sheet.txt
Now let’s check the contents of the directory:
$ pwd
/Users/bini/projects
$ ls
cheat-sheet.txt
OK, so the file has been created. But what was the > in the command we used? On the command line, a > is known as a “redirect.” It takes the output of a command and puts it in a file. Be careful, since it’s possible to overwrite files with the > command.
If you want to add text to a file but not overwrite it, you can use the >> command, known as the redirect and append command, instead. If there’s already a file with text in it, this command can add text to the file without destroying and recreating it.
Cat
Let’s check if there’s any text in cheat-sheet.txt.
$ cat cheat-sheet.txt
This is my cheat sheet
As you can see, the cat command prints the contents of a file to the screen. cat stands for “concatenate,” because it can link strings of characters or files together from end to end.
A note on file naming
Your cheat sheet is titled cheat-sheet.txt instead of cheat sheet.txt for a reason. Can you guess why?
Try to make a file titled cheat sheet.txt and report to the class what happens.
Now imagine you’re attempting to open a very important data file using the command line that is titled cheat sheet.txt.
For your digital best practices, we recommend making sure that file names contain no spaces–you can use creative capitalization, dashes, or underscores instead. Just keep in mind that the OS and Unix file systems are usually pre-configured as cAsE-pReSeRvInG, which means that capitalization matters when you type commands to navigate between or do things to directories and files.
Using a text editor
The challenge for this section will be using a text editor, specifically Visual Studio Code, to add some of the commands that we’ve learned to the newly created cheat sheet. Text editors are programs that allow you to edit plain text files, such as .txt, .py (Python scripts), and .csv (comma-separated values, also known as spreadsheet files).
Challenge
You could use the GUI to open your Visual Studio Code text editor–from your programs menu, via Finder or Applications or Launchpad in Mac OSX, or via the Windows button in Windows–and then click “File” and then “Open” from the drop-down menu and navigate to your Desktop folder and click to open the cheat-sheet.txt file.
OR, you can open that specific cheat-sheet.txt file in the Visual Studio Code text editor directly from the command line! Let’s try that by using the code command in the command line:
$ code cheat-sheet.txt
Now that you’ve got your cheat sheet open in the Visual Studio Code text editor, type to add the commands we’ve learned so far to the file. Include descriptions about what each command does. Remember, this cheat sheet is for you. Write descriptions that make sense to you or take notes about questions.
Save the file.
Once you’re done, check the contents of the file on the command line with the cat command:
$ cat cheat-sheet.txt
My Institute Cheat Sheet

ls
lists files and folders in a directory

cd ~
change directory to home folder

...
Pipes
So far, you’ve learned a number of commands and one special symbol, the > or redirect. Now we’re going to learn another, the | or “pipe.”
Pipes let you take the output of one command and use it as the input for another.
Let’s start with a simple example:
$ echo "Hello from the command line" | wc -w
5
In this example, we take the output of the echo command (“Hello from the command line”) and pipe it to the wc or word count command, adding a flag -w for number of words. The result is the number of words in the text that we entered.
Let’s try another. What if we wanted to put the commands in our cheat sheet in alphabetical order?
Use pwd and cd to make sure you’re in the folder with your cheat sheet. Then try:
$ cat cheat-sheet.txt | sort
You should see the contents of the cheat sheet file with each line rearranged in alphabetical order. If you wanted to save this output, you could use a > to print the output to a file, like this:
$ cat cheat-sheet.txt | sort > new-cheat-sheet.txt
Exploring text data
So far the only text file we’ve been working with is our cheat sheet. Now, this is where the command line can be a very powerful tool: let’s try working with a large text file, one that would be too large to work with by hand.
Let’s retrieve the data we’re going to work with:
From your GUI (the front end of your computer), go to Files and open your USB flash drive called USB30FD. Locate the file called
nypl_items.csv
Drag and drop this file into your Downloads folder.
Our data set is a list of public domain items from the New York Public Library. It’s in .csv format, which is a plain text spreadsheet format. CSV stands for “comma separated values,” and each field in the spreadsheet is separated with a comma. It’s all still plain text, though, so we can manipulate the data using the command line.
Move command
Once the file is downloaded, move it from your Downloads folder to the projects folder on your desktop–either through the command line, or drag and drop in the GUI. Since this is indeed a command line workshop, you should try the former!
To move this file using the command line, you first need to navigate to your Downloads folder where that file is saved. Then type the mv command followed by the name of the file you want to move and then the file path to your projects folder on your desktop, which is where you want to move that file to (note that ~ refers to your home folder):
$ mv nypl_items.csv ~/Desktop/projects/
You can then navigate to that projects folder and use the ls command to check that the file is now there.
Viewing data in the command line
Try using cat to look at the data. You’ll find it all goes by too fast to get any sense of it. (You can click Control and C on your keyboard to cancel the output if it’s taking too long.)
Instead, let’s use another tool, the less command, to get the data one page at a time:
$ less nypl_items.csv
[...]
Less gives you a paginated view of the data; it will show you contents of a file or the output from a command or string of commands, page by page.
To view the file contents page by page, you may use the following keyboard shortcuts (that should work on Windows using Git Bash or on Mac):
Click the f key to view forward one page, or the b key to view back one page.
Once you’re done, click the q key to return to the command line.
Let’s try two more commands for viewing the contents of a file:
$ head nypl_items.csv
[...]
$ tail nypl_items.csv
[...]
These commands print out the very first (the “head”) and very last (the “tail”) sections of the file, respectively.
Pro-Tip: tab completion.
When you are navigating in the command line, typing folder and file names can seem to go against the promise of easier communication with your computer. Here comes tab completion, stage right!
When you need to type out a file or folder name–for example, the name of that csv file we’ve been working with: nypl_items.csv–in the command line and want to move more quickly, you can just type out the beginning characters of that file name up until it’s distinct in that folder and then click the tab key. And voilà! Clicking that tab key will complete the rest of that name for you, and it only works if that file or folder already exists within your working directory.
In other words, anytime in the command line you can type as much of the file or folder name that is unique within that directory, and tab complete the rest!
Note: Clearing Text
If all the text remaining in your terminal window is starting to overwhelm you, you have some options. You may type the clear command into the command line, or click the command and k keys to clear the scrollback. In Mac OS terminal, clicking the command and l keys will clear the output from your most recent command.
Cleaning the data
We didn’t tell you this before, but there are duplicate lines in our data! Two, to be exact. Before we try removing them, let’s see how many entries are in our .csv file:
$ cat nypl_items.csv | wc -l
100001
This tells us there are 100,001 lines in our file. The wc tool stands for “word count,” but it can also count characters and lines in a file. We tell wc to count lines by using the -l flag. If we wanted to count characters, we could use wc -m. Flags marked with hyphens, such as -l or -m, indicate options which belong to specific commands. See the glossary for more information about flags and options.
To find and remove duplicate lines, we can use the uniq command. Let’s try it out:
$ cat nypl_items.csv | uniq | wc -l
99999
OK, the count went down by two because the uniq command removed the duplicate lines. But which lines were duplicated?
$ $ cat nypl_items.csv | uniq -d
[...]
The uniq command with the -d flag prints out the lines that have duplicates.
Challenge
Use the commands you’ve learned so far to create a new version of the nypl_items.csv file with the duplicated lines removed. (Hint: your cheat sheet is your friend.)
Searching text data
So we’ve cleaned our data set, but how do we find entries that use a particular term?
Let’s say I want to find all the entries in our data set that use the term “Paris.”
Here we can use the grep command. grep stands for “global regular expression print.” The grep command processes text line by line and prints any lines which match a specified pattern. Regular expressions are infamously human-illegible commands that use character by character matching to return a pattern. grep gives us access to the power of regular expressions as we search for text.
$ cat nypl_items.csv | grep -i "paris"
[...]
This will print out all the lines that contain the word “Paris.” (The -i flag makes the command ignore capitalization.) Let’s use our wc -l command to see how many lines that is:
$ cat nypl_items.csv | grep -i "paris" | wc -l
191
Here we have asked cat to read nypl_items.csv, take the output and pipe it into the grep -i command, which will ignore capitalization and find all instances of the word “paris.” We then take the output of that grep command and pipe it into the word count wc command with the -l lines option. The pipeline returns 191 letting us know that Paris (or paris) occurs on 191 lines of our data set.
Challenge
Use the grep command to explore our .csv file a bit. What areas are best covered by the data set? What does this say about the items in the New York Public Library public domain?
Before we finish…
Before you leave today, we’re going to prepare a little for our upcoming sessions. In your projects folder on the desktop, we’re going to create a folder to house our cheat sheets for the week, as well as a new folder for the upcoming databases workshop.
$ pwd
/Users/bini/Desktop/projects
$ mkdir cheatsheets
$ mkdir databases
Then move your cheat-sheet.txt file into your cheatsheets folder and your nypl_items.csv into your databases folder with the mv command:
$ mv cheat-sheet.txt cheatsheets
$ mv nypl_items.csv databases
What we’ve learned
You’ve made it through your introduction to the command line! By now, you have experienced some of the power of communicating with your computer using text commands. The basic steps you learned today will help as you move forward through the course - you’ll work with the command line interface to set up your version control with git and you’ll have your text editor open for the rest of the week as you write python scripts and build basic websites with HTML and CSS.
Now is a good time to do a quick review!
In this session, we learned:
- how to use
touchandechoto create files - how to use
mkdirto create folders - how to navigate our file structure by
cd(change directory),pwd(print working directory), andls(list) - how to use redirects (
>) and pipes (|) to create a pipeline - how to explore a comma separated values (.csv) dataset using word and line counts,
headandtail, and the concatenate commandcat - how to search text files using the
grepcommand
and we made a cheat sheet for reference!
When we started, we reviewed what text is–whether plain or enriched. We learned that text editors that don’t fix formatting of font, color, and size, do allow for more flexible manipulation and multi-program use. If text is allowed to be a string of characters (and not specific characters chosen for their compliance with a designer’s intention), that text can be fed through programs and altered with automated regularity. Text editors are different software than Bash (or Terminal), which is a text-based shell that allows you to interact directly with your operating system giving direct input and receiving output.
Having a grasp of command line basics will not only make you more familiar with how your computer and basic programming work, but it will also give you access to tools and communities that will expand your research.
Moving forward
What you have learned will be useful as you move forward through these tutorials. The command line will be immediately necessary for setting up your computer for version control with git in the next session! You’ll find that knowing a few commands can help immeasurably as you find new tools to use.
Next: Introduction to Git (And Markdown Too!)
-
Unicode is an information technology standard for the consistent encoding, representation, and handling of text expressed in most of the world’s writing systems. The standard is maintained by the Unicode Consortium, and as of March 2020, there is a repertoire of 143,859 characters, with Unicode 13.0 (these characters consist of 143,696 graphic characters and 163 format characters) covering 154 modern and historic scripts, as well as multiple symbol sets and emoji (Wikipedia contributors, “Unicode”). ↩︎
-
Ubuntu (pronounced “uh-BUN-two”) is a free and open-source Linux distribution based on Debian. Debian, also known as Debian GNU/Linux, is a Linux distribution composed of free and open-source software, developed by the community-supported Debian Project, which was established by Ian Murdock on August 16, 1993. A Linux distribution (often abbreviated as distro) is an operating system made from a software collection that is based upon the Linux kernel and, often, a package management system (all definitions from Wikipedia). ↩︎