Introduction to Git (and Markdown too!)
Adapted from Introduction to the Command Line by Kelsey Chatlosh, Patrick Smyth, Mary Catherine Kinniburgh, and Jojo Karlin for Graduate Center Digital Research Institute January 2020 Curricula. Copyright (c) 2020-present Sabina Pringle with a Creative Commons Attribution-ShareAlike 4.0 International license.
Overview and learning goals
This session will show how to use Git for a variety of digital undertakings, including collaborating with others and sharing work. This session covers initializing Git repositories, committing changes, and copying repositories to your local machine. You will also learn some basics of Markdown, a lightweight markup language with plain-text-formatting syntax.
To complete this workshop, you will use Visual Studio Code (VS Code) and Git. Both of these are already installed on your computer. To make sure that they are up to date type code --version in your terminal and hit enter. The computer should tell you what version of VS code is installed. Then, type git --version and hit enter, and you should see what version of Git you have.
What is Git?
Git is software used for version control. Version control is tracking the state of files. Using Git, you designate certain folders as repositories, then use commands to save the state of the repository at certain points in time. A repository is a place where things can be stored, and in this context indicates a folder that is being tracked by Git. With Git, you can perform tasks such as reverting back to previous versions of a repository, copying or sharing repositories across computers, and comparing different versions of a project.
You may have heard of GitHub, which is sometimes confused with Git. In this course we won’t use GitHub because it doesn’t work without the internet. But in case you haven’t heard of GitHub and just so you know what it is, Github is a cloud service for hosting Git repositories and has become something of a social network for programmers, who use it to share code and writing with a wider community.
This is essentially what we are going to do here. Because we don’t have access to the internet, our workaround will be to share code and writing with each other using USB sticks. To keep track of project contributions, share comments and be able to go back to older versions or retrieve parts of them, we will use Git for version control on the USB sticks.
What you can do with Git
Git is used for a diverse range of activities, such as:
- Developing software
- Sharing data sets
- Creating websites
- Writing research papers, articles and books
- Keeping research notes
Why use Git in collaborative work?
Git is useful in digital humanities work for several reasons. In particular, it facilitates:
- Sharing and backing up files on multiple computers
- Monitoring changes effectively
- Recovering from bugs or errors by going back in time before the error arose
- Using different branches for experiments and new directions
- Sharing and managing files with others—seeing who added what content and when
Sharing and Attribution
Version control facilitates attribution and citation by clearly tracking which content was created by whom, when it was added, and which projects or materials are derived from others.
Collaborative Writing
Some of us use Git to track changes (version control in Git parlance) in writing projects. This way if we want to return to an idea from an earlier draft, or to put back in a section that had been cut out for whatever reason, we can retrieve it from an earlier version.
Backup
In case a computer crashes and sections of a collaborative project get lost, if revisions were tracked using Git the previous versions of the project would always be saved and changes documented.
Versions Across Time
Naming versions of a document can get messy. Have you ever had a folder full of multiple and conflicting versions of documents that looked like this?
|
--Documents
   |
   --essay.doc
   --essay2.doc
   --essaynew.doc
   --essayRevised.doc
   --essayRevisedagain.doc
   --essayFINAL.doc
   --essayFINAL2.doc
   --essay?.doc
By using Git for version control you only need to have one document. Git tracks versions so you never really lose any changes you make.
Review of the Command Line
In this session, we’ll be using the command line (terminal, bash) which you learned to use in the command line session. We’ll also use a text editor called Visual Studio Code, or VS Code. We’ll be moving between these two spaces throughout the session. In addition to these, in the second part of the session we’ll use remote repositories on USB sticks.
First, let’s quickly review some command line basics, including navigation.
Accessing the Terminal
First way:
Double-click on the terminal icon on the left hand side of your screen. The symbols on the terminal icon look a bit like this: >_
Second way:
- Double-click on the word “Activities” in the top left corner of your screen.
- Type “terminal” into the bar that appears.
- Select the first item that appears in the list.
Practice navigating the command line
In your terminal, type
$ cd Desktop
and hit enter. This will change your current working directory from /Users/<your-name> to /Users/<your-name>/Desktop.
To check what directory you are in, type
$ pwd
Try this now to make sure you’re in your Desktop directory.
Now, use
$ cd ..
to go up one directory. In this case, this will take you back to your home directory.
Practice going back and forth between your Desktop and your home directory.
When finished, go to your Desktop folder and check that you’re there with pwd.
Making a Git Project Folder
In the command line session you created a projects folder on your Desktop. Navigate into it with
$ cd projects
If you don’t have a projects folder on your desktop, create one with
$ mkdir projects
From Desktop, navigate into your projects folder. Then create a git-practice folder by typing
$ mkdir git-practice
Go into the new folder by typing
$ cd git-practice
At this point, when you type pwd, your folder structure should look like this:
/home/yourusername/Desktop/projects/git-practice
Setting Up Git
Our first step in working with Git is configuring it with your own name and information.
Check Your Install
Let’s make sure Git has been successfully installed. In your terminal, type
$ git --version
If you see a version number, you’re all set. If not, ask the instructor for help.
Configuring Git on Your Computer
Before we get started, we’ll want to configure git so that it can identify who we are. This information is useful because it connects identifying information with the changes you make in your repository.
Type the following into your command line, filling in the sections—below labelled “yourusername” — for your name and email. Use the username you designated for your computer (my username, for example, is bini). If you have not designated a username for your computer ask the instructor to show you how to do this. You can invent an email address.
$ git config --global user.name "yourusername"
$ git config --global user.email yourusername@anymail.com
To check your set-up, use:
$ git config --list
You’ll get something that looks like this:
user.name=bini
user.email=bini@gmail.com
Now we’re ready to start using Git.
Initializing a Git repository
Using cd, navigate to the git-practice folder inside projects. From your home directory, type:
$ cd Desktop/projects/git-practice
Now we’re going to initialize our repository, which means telling Git to pay attention to it:
$ git init
You should see output like this:
Initialized empty Git repository in /home/bini/projects/git-practice/.git/
Now Git is tracking our directory. But before that’s useful, we’ll have to create a text file for Git to track. For this session, the file we’ll track will be a journal — we’ll create that next, using Markdown.
Using Markdown
What is Markdown?
Markdown is a markup language for formatting text. Unlike HTML, markdown is designed to be human-readable, which makes it much easier to learn than other computer languages. Since markdown is plain text, it’s more sustainable and accessible than formats like .docx.
Writing a journal entry with Markdown
To create a plain text file, we’re going to switch to our text editor, VS Code, to create and edit a file named journal.md and save it to our git-practice folder.
In terminal, check to make sure you are in your git-practice folder. (HINT: use ‘pwd’ to see what directory you are currently in) Next, type:
$ code journal.md
Hit return. You should see a window appear that looks similar to this:
We’ll be typing our markdown into this VS Code window. At any time, you can save your file by pressing the control (Ctrl) and the s keys at the same time. Alternatively, you can click the File menu on the top left, then select Save from the dropdown menu.
Markdown allows us to format textual features like headings, emphasis, links, and lists in a plain text. Markdown files usually have a .md extension.
In markdown, we insert headings with a single hash mark like this:
# My Journal Heading
A sub-heading (H2) heading uses two hash marks like this:
## Second technical skills session
To provide emphasis, place asterisks around some text:
*This text will appear italicized.*

**This text will appear bold.**
To create a bulleted list, put a hyphen at the beginning of each list item, like this:
- went over command line
- learned to do stuff with Git
- created a VS code file
Your list will look like this:
- went over command line
- learned to do stuff with Git
- created a VS code file
Paragraphs of text are made with a sideways carrot thing:
> This is a paragraph in markdown. It's separated from the paragraph below with a blank line. There is a little space before and after the paragraph when it is rendered.
This is how the paragraph is rendered:
This is a paragraph in markdown. It’s separated from the paragraph below with a blank line. There is a little space before and after the paragraph when it is rendered.
Try using these five elements—headings, emphasis, lists, links, and paragraphs—to create a journal entry. Have a main heading that gives the journal title (one #), then subheadings (two ##) for, at least, a couple of things you want to mention. Use emphasis (* or **) for some words and try to get a list in there somewhere.
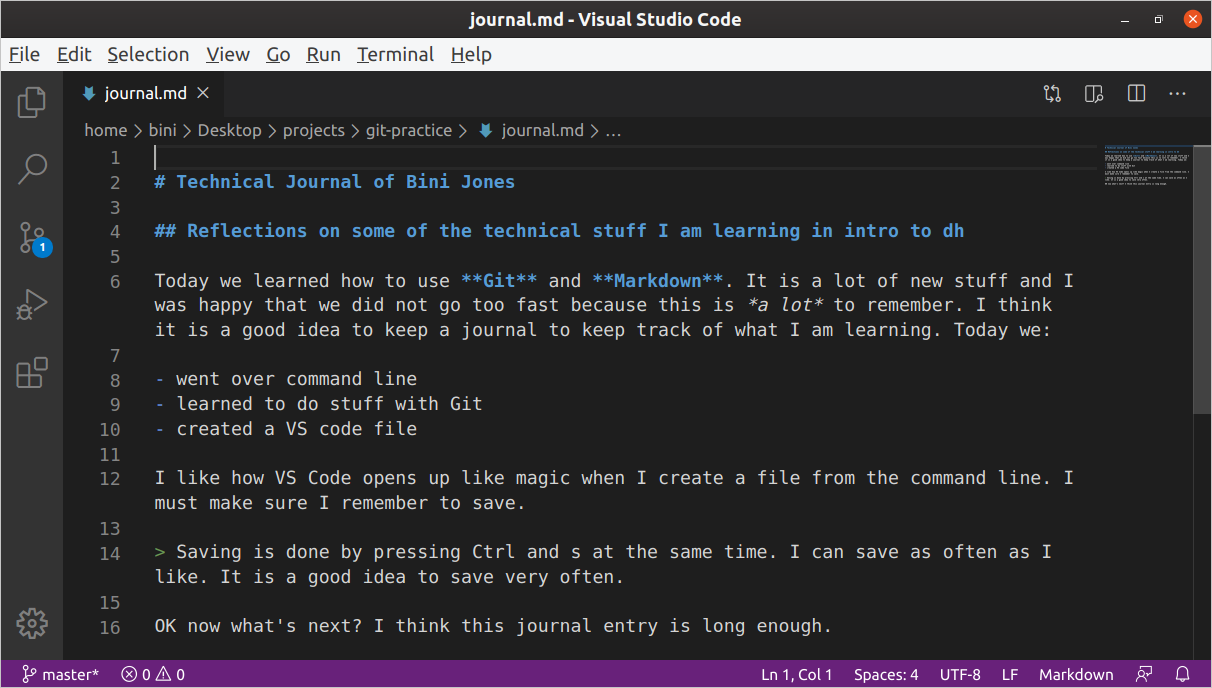
VS Code also has a preview feature for your markdown. Hit the preview button on the top right while editing your markdown file (the preview button looks like an open bobok with a magnifying glass on it).
You’ll get two side-by-side panels. Your markdown file will be on the left, and your rendered preview will be on the right:

Remember to save your work with Control-s.
Staging and committing changes
Git’s primary function is to track a project as it exists at different points in time. Now that we have a file to track — our technical journal — let’s use Git to save the current state of the repository as it exists now.
A commit is a snapshot
In Git, a commit is a snapshot of a repository that is entered into its permanent history. To commit a change to a repository, we take two steps:
- Adding files to a “staging area,” meaning that we intend to commit them
- Finalizing the commit
Making a commit is a lot like taking a photo. First, you have to decide who will be in the photo and arrange your friends or family in front of the camera. Once everyone is present and ready, you take the picture, entering that moment into the permanent record.
Staging changes with the add command
First, let’s use a useful command to see what state Git is currently in. It’s a good idea to use this command before and after doing anything in Git so you can always be on the same page as the computer.
Make sure you’re in your /home/yoursusername/Desktop/projects/git-practice directory using the pwd command in the terminal. Once you’re there, enter this command:
$ git status
You should see output like this:
On branch master

No commits yet

Untracked files:
  (use "git add <file>..." to include in what will be committed)

	journal.md

nothing added to commit but untracked files present (use "git add" to track)
This means we’ve initialized our repository, but haven’t made any commits yet. If you’re instead getting a message that begins with the word fatal when you use git status, you may be in the wrong directory or perhaps you haven’t run the git init command on your directory yet.
Let’s follow the recommendation in the status message above and use the add command to stage files, making them ready to be committed.
Type this command:
$ git add journal.md
You should see no output from the command line, meaning that the above command succeeded. Let’s run git status again to check if things have changed. You should see output like this:
On branch master

No commits yet

Changes to be committed:
  (use "git rm --cached <file>..." to unstage)

	new file:   journal.md
The new file: journal.md should be highlighted in green to show that it’s ready for commit.
Committing Changes
Now that our files have been staged, let’s commit them, making them part of the permanent record of the repository. Type:
$ git commit -m "Initial commit of journal file"
The -m flag provides a message along with the commit that will tell others — or remind a future version of yourself — what the commit was all about. Try not to type git commit without the -m flag for now — there’s a note about this below.
After running the command, you should see output like this:
[master (root-commit) 0606d34] Initial commit of journal file
 1 file changed, 16 insertions(+)
 create mode 100644 journal.md
This means you have successfully made your first commit in the repository — congratulations!
Let’s check the state of our repository after the commit with git status:
On branch master
nothing to commit, working tree clean
This means that everything in the repository is successfully committed and up-to-date. If you edit your syllabus file or create a new file in the repository., the message you get with git status will instead list files that have uncommitted changes.
Let’s run one other command to see the effect our commit has had. Enter this command:
$ git log
You should see output similar to this:
commit 0606d3482b04ccbc62b0afd55520ee13c34c05a3 (HEAD -> master)
Author: bini <bini@gmail.com>
Date:   Mon May 4 21:43:23 2020 -0400

    initial commit of journal file
This is the log of commits, comprising a history of your repository. There’s only one commit here now, though. If you don’t see a prompt (the $) after running git log, you may need to press the q key (just the q key by itself) to return to the command line.
Optional: why do we need to use the -m flag?
If you type git commit by itself, git will open the command line’s default text editor to allow you to enter the commit message. Unfortunately, the default text editor, vi, requires some knowledge to use, and we are not going to teach it as part of our sessions.
If you find yourself stuck in an unfamiliar screen in the command line after running git commit, you’re probably in vi. Type this to leave that environment and return to the $ prompt:
:q
If you’re ever stuck or “trapped” on the command line, try running through these common exit commands to return to the prompt: Control-c, Control-z, q or :q
Control-c attempts to abort the current task and restore user control. Control-d escapes the current shell environment—if you use it at the normal $ prompt, it will end the current command line session. q is used to escape from specific utilities. :q first changes the mode in vi, allowing you to enter the q key to quit, so it’s a command specific to vi.
In order to work together on collaborative projects we will share files with USB sticks. We will use Git to track changes in these files, and do a lot of pushing and pulling to remote repositories housed on these USB sticks.
Pushing to a remote repository
I am working on this section and will add it here soon.
Next: Introduction to HTML and CSS